How to add a testimonial to your website
To add a new testimonial to your website we will use the same simple steps outlined in "How to edit a page" with a few extra steps.
Please note: This How-To explains how to add a testimonial to your testimonials page. Some of our design templates display a few testimonials with a button to read more in the sidebar or footer of the website. To learn how to update these "teaser" testimonials click here.
Step 1
Sign in to the Content Management System (CMS) by clicking the Sign In link in the bottom right of your website. When you have securely logged in, your site is aware of who you are and what you have access to edit and create.
Step 2
Navigate to the testimonials page just as you normally would.
Put the page in edit mode by clicking Edit in the editing tool bar located in the top left of your page. The page edit dropdown will open, select Edit this Page. Edit will change to Editing and turn green, indicating the page is now in edit mode.
Step 3

The page will reload with all of the areas you can edit highlighted in dotted red borders. In addition, any editable regions will highlight grey when you hover your mouse over the area.
Please note: Each testimonial has been placed in its own block. This helps keep the formatting and allows you to quickly change the order in which they appear. To add a new testimonial you will be adding a new content block to the page.
To add a new content block, click on the Add To main area bellow the last testimonial. This will open a new window with a list of options available in this region. Select Add Block, a new new window will open with all of the available block types that you can add. Select the second option from the top named Content.
Step 4

The content editing interface will open. Enter (type or paste) your new testimonial.
Please note: The three clipboards in the upper left corner of the editing interface give you a few options for pasting text. If you are pasting from MS Word, click the clipboard with the Word icon. This will help strip the text of any formatting that may carry over from Word.
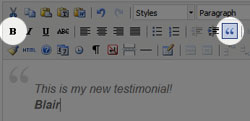
Now we can format your new testimonial. You should now have a testimonial followed by a name. To place the name directly under the testimonial without a space, use a soft return (hold Shift and press Enter). Next, bold the name by highlighting the text and clicking the B in the tool bar. Now add the quote marks by highlight all of the text (testimonial and the name) and clicking the quote marks in the tool bar.
Click Add and the editing interface will close.
Step 5
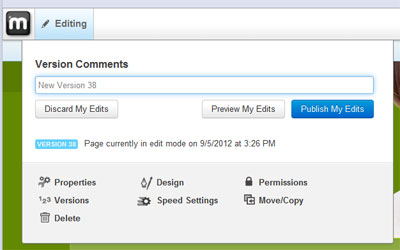
The final step to adding your testimonial is to publish and make them visible to your visitors. To do this, click on the green Editing button in the top left of your screen. The Editing menu will open with three options.
- 1. Discard My Edits - Throw away all the changes you just made and revert to the last published version.
- 2. Preview My Edits - Save these edits as a new version, but do not publish. When logged in you will see this most recent version, but regular site visitors will only see the last published version.
- 3. Publish My Edits - Save your edits, and make them live for all visitors to see.
Once you are happy with your changes, click Publish My Edits and you're done!